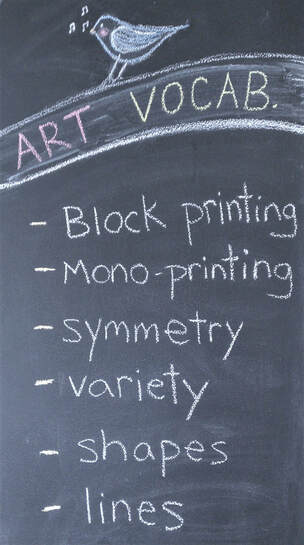
Week 5 : Block and Mono Printmaking Project
IMPORTANT: Students use your CPS email when sending your project to me. INCLUDE the following in your email subject: your name, homeroom #, and 'yes' or 'no' if you want your art posted on the student artwork page of this website.
IMPORTANT: Students use your CPS email when sending your project to me. INCLUDE the following in your email subject: your name, homeroom #, and 'yes' or 'no' if you want your art posted on the student artwork page of this website.
|
Materials needed:
Choose the supplies that you have at home. -paper (copy paper, line paper, construction paper, or newspaper) -water soluble/washable markers (you could also use paint if you have some) -paint brush or Q-tip -dull pencil -cup/bowl for water -styrofoam (from cup, plate, veggie/meat tray, egg carton,or to-go box) -paper towel or sponge -found objects (example: bottle cap, paper towel roll, sliced fruit or vegetable) -paint (not required) -scissors |
|
Directions: (This project can be done individually or with your family. You don't have to do all of the printmaking examples. You choose which one you'd like to do.)
Step 1: Watch the video link above on Ms. Rowland.
Step 2: You choose which printmaking technique works best for you.
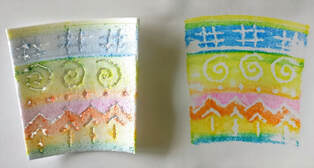
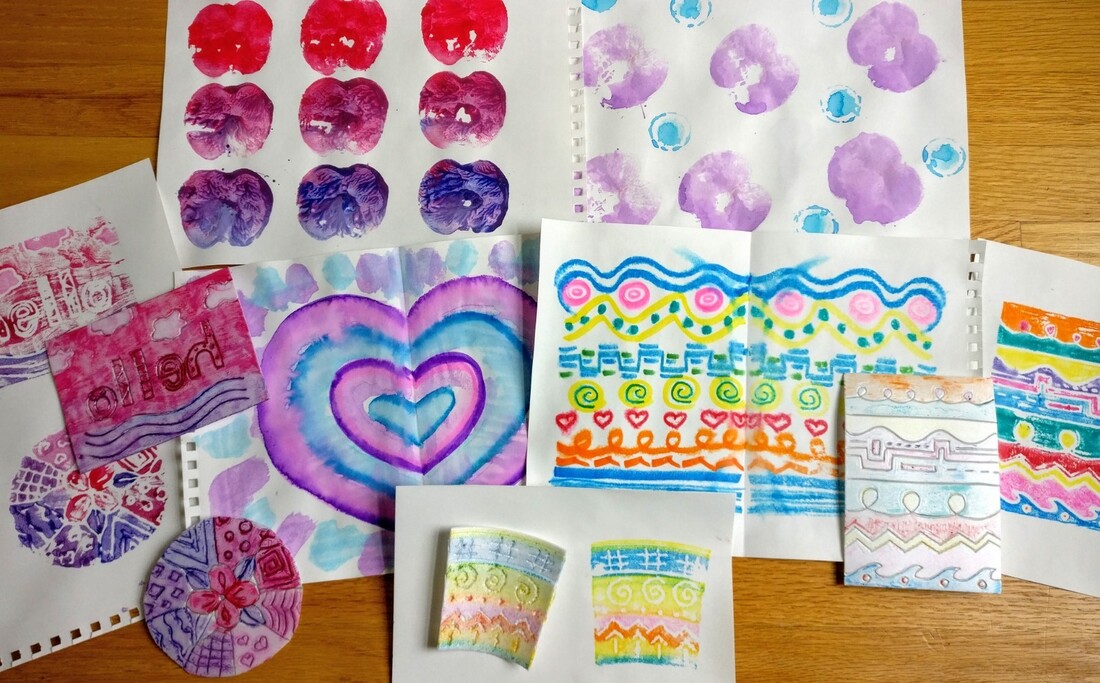
Step 3: If you choose block printing with styrofoam, then push into it using a dull pencil to create a design.
Step 4: Then color the styrofoam with washable markers.
Step 5: Then get a sheet of paper. Dampen it with a wet paper towel or sponge. Then print the styrofoam onto the damp paper (design face down). Then peel off to reveal your printed design.
Step 1: Watch the video link above on Ms. Rowland.
Step 2: You choose which printmaking technique works best for you.
Step 3: If you choose block printing with styrofoam, then push into it using a dull pencil to create a design.
Step 4: Then color the styrofoam with washable markers.
Step 5: Then get a sheet of paper. Dampen it with a wet paper towel or sponge. Then print the styrofoam onto the damp paper (design face down). Then peel off to reveal your printed design.
|
|
Step 6: If you are doing block printing with found objects, then dip them into paint (either paint you have at home or homemade liquid watercolor I showed how to make in the video) and stamp onto paper.

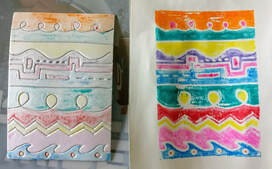
Step 7: If you are doing the symmetrical mono-printing technique, then fold a sheet of paper in half. Then color one half with washable markers.
Step 8: Then dampen the blank side with a wet paper towel or sponge. Then refold the paper back in half to print the colored side onto the other side. Then rub it and open the paper to reveal the symmetrical mono-print.
Step 8: Then dampen the blank side with a wet paper towel or sponge. Then refold the paper back in half to print the colored side onto the other side. Then rub it and open the paper to reveal the symmetrical mono-print.
|
|
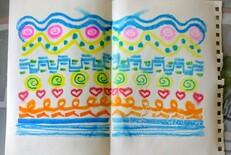
Week 5: Alternative Art Project:
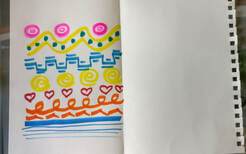
Pattern Design
(If you don't have the materials for doing the week 5 video lesson, you can do this project instead.)
You can create this using paper and any drawing materials or you can use any digital drawing program or app of your choice. For the project, create a pattern. Make your pattern design interesting, by incorporating a variety of shapes, lines, and colors. Be creative with it and have fun!
IMPORTANT: Students use your CPS email when sending your project to me. INCLUDE the following in your email subject: your name, homeroom #, and 'yes' or 'no' if you want your art posted on the student artwork page of this website.
[email protected]
[email protected]